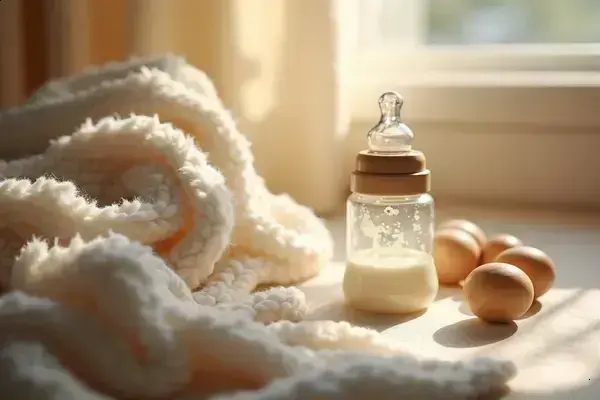
Imagine holding a tiny newborn in your arms, the world around you fading into a soft blur as you try to freeze those first precious moments forever. It’s overwhelming — but capturing these memories perfectly is more doable than you think.
Missing key steps can turn what should be a joyful experience into a stressful scramble. You risk losing those delicate expressions and first poses, which will never come back. Plus, last-minute chaos just wears everyone down.
With this newborn photography checklist, you’ll know exactly what to prepare, how to pose, and when to shoot to create stunning photos that tell your newborn’s unique story. Ready to capture magic? Let’s start with the essentials you can’t miss.
Essential Gear And Equipment For Newborn Photography
What exactly makes newborn photography gear “essential”? It’s not about having everything — it’s about picking the right tools that give you flexibility, safety, and beautiful results. You want equipment that keeps your baby comfortable while allowing you to craft those delicate, timeless shots.
Picture this scenario: you’ve got a squirmy newborn who’s just waking up—everything about this shoot needs to feel calm and effortless. Having the right gear means less fuss and more photos that truly capture those fleeting moments.
- Camera Body: A DSLR or mirrorless with reliable autofocus and high ISO capabilities. The Canon EOS R5 or Sony A7 III are favorites among professionals for their sharp images in low light.
- Lenses: Prime lenses like 50mm f/1.8 or 85mm f/1.4 offer crisp shots and dreamy backgrounds. Macro lenses come handy for tiny details like little fingers and toes.
- Tripod: Keeps your shots steady—important in dimmer lighting conditions and when you want consistency in framing.
- Soft Lighting: Natural light is ideal, but if you need extra, opt for continuous softbox lights or LED panels with adjustable warmth to keep the scene cozy and shadow-free.
- Props and Backgrounds: Invest in soft, natural fabrics (cotton, muslin) and simple backdrops that don’t distract from the baby. Neutral, pastel colors often work best.
- Safety Accessories: Heating pads, cushions, and beanbags designed for newborns ensure the infant’s comfort and help with posing safely.
💡 Pro Tip: According to the Professional Photographers of America, prioritizing natural fabrics and adjustable lighting improves newborn photos drastically without exposing babies to harsh conditions.
It’s tempting to overload your kit, but less is often more here. Every piece should serve a clear purpose—safety and comfort being at the forefront of the decision-making process.
| Equipment | Purpose | Recommended Models |
|---|---|---|
| Camera Body | High-quality image capture in low light | Canon EOS R5, Sony A7 III |
| Prime Lenses | Portrait clarity and soft background | 50mm f/1.8, 85mm f/1.4 |
| Lighting | Soft, adjustable illumination | Continuous softbox, LED panels |
But there’s one detail most owners completely overlook until it’s too late: how vital it is to test and familiarize yourself with your gear before the big day.
Creating A Safe And Comfortable Environment
How do you ensure a newborn feels safe and cozy during a photography session? Creating the right environment is crucial. It’s more than just aesthetics — it’s about prioritizing the baby’s comfort and wellbeing first.
Newborns are incredibly sensitive to temperature and touch, so a warm, calm space is non-negotiable. The truth is: even slight discomfort can cause fussiness or sleeplessness, cutting short your photo session. You want to avoid that at all costs.
In practice: imagine a softly lit studio where the temperature is carefully maintained around 80°F (27°C), with a space heater gently warming the area. Everything from blankets to props is pre-washed and made from breathable, hypoallergenic fabrics to prevent skin irritation.
- Temperature Control: Maintain a warm room to mimic a womb-like environment. Babies relax — and stay asleep longer — when they’re comfortably warm.
- Sanitized Props and Fabrics: Cleanliness is essential. Using freshly laundered, natural fabrics helps protect sensitive skin and reduces the chance of allergies.
- Soft and Supportive Surfaces: Use padded cushions, beanbags, and wraps that cradle the baby safely and gently. Safety must come first with firm support beneath soft coverings.
- Noise and Lighting: Minimize sudden sounds and use soft, warm lighting to prevent startling the newborn. Dimmed lamps or natural window light filtered through sheer curtains work beautifully.
💡 Pro Tip: According to the National Association of Professional Child Photographers, keeping a warm, quiet, and clean environment maximizes the chances of snagging those peaceful, dream-like shots you want.
| Environment Aspect | Best Practice | Why It Matters |
|---|---|---|
| Room Temperature | Keep between 78°F and 82°F | Prevents baby from getting cold and fussy |
| Fabric Selection | Use 100% cotton or muslin, freshly laundered | Gentle on delicate skin, avoids irritation |
| Noise Level | Maintain quiet, use white noise if needed | Promotes calmness and uninterrupted sleep |
Here’s the thing: a lot of photographers focus on poses and lighting but forget the foundation—the environment. The next step is mastering poses that keep your newborn both safe and photogenic. What actually works might surprise you…
Posing Techniques To Highlight Your Newborn
Why does the way you pose a newborn make such a difference? It’s not just about aesthetics — it’s about showcasing your baby’s delicate features while keeping them safe and comfortable throughout the session.
Picture this scenario: a sleepy newborn gently curled up in a natural pose, looking peaceful and serene. Achieving this requires understanding infant anatomy, patience, and some essential posing techniques that highlight their tiny hands, soft cheeks, and those adorable little toes.
Start with simple, natural positions that mimic how babies naturally rest. Swaddling helps to create that cozy sense of security and restricts sudden movements. Popular poses include the “froggy pose,” “side-lying,” and the classic “tushy up” position, but each must be done carefully to avoid stress on joints and neck.
- Support Is Key: Always use your hands or soft props like cushions to support the baby’s head and limbs. Never force a baby into a pose.
- Safe Spotting: Keep a close eye on breathing and circulation. If your baby seems uncomfortable, change pose immediately.
- Use Natural Curves: Highlight tiny details—curled fingers, bent knees, or the gentle arch of the back.
- Soft Textures: Drape with breathable fabrics to accentuate softness and add depth without distracting from the baby.
💡 Pro Tip: The Infant Safe Posing Guidelines by the Professional Photographers of America stress resting poses that minimize strain and promote safety—always prioritize comfort over perfection.
Step-By-Step Posing Process
- Begin with swaddling your newborn snugly to calm them.
- Gently transition to side-lying or back-lying positions using soft props.
- Adjust hands and feet to showcase natural curves and tiny details.
- Keep lighting soft to enhance contours without startling the baby.
- Always monitor for signs of discomfort or stress.
| Pose Name | Description | Safety Tips |
|---|---|---|
| Froggy Pose | Baby rests on tummy with knees tucked under chin | Require spotters and cushion support to prevent strain |
| Tushy Up | On back with legs curled under body highlighting bum | Use gentle wraps and support for hips |
| Side-Lying | Baby rests on side in natural fetal position | Keep head supported, monitor breathing |
The truth is: mastering poses isn’t just about technique — it’s reading your baby’s cues and acting accordingly. And this is exactly where most people make the most common mistake…
Timing And Lighting Tips For Perfect Shots
When it comes to newborn photography, timing isn’t just about the clock—it’s about capturing your baby at their most peaceful and photogenic moments. You might wonder, when exactly is the best time to shoot? The answer often lies in understanding your newborn’s natural rhythms and how light interacts with your surroundings.
Picture this scenario: you’re ready for the session, but your baby is wide awake and fussy. Trying to snap photos now could mean forcing moods that don’t showcase their best side. Newborns tend to be sleepiest and calmest within the first two weeks, particularly in the morning when natural light is softest and most flattering.
Here’s the thing: golden hour isn’t just for sunsets. Early morning light filters through windows with a warm, gentle glow that minimizes harsh shadows and highlights the baby’s delicate skin tones beautifully. Use this to your advantage by scheduling shoots when sunlight is diffused and indirect.
- Morning Sessions: Aim for 8 AM to 11 AM when natural light is soft and even, offering the most flattering illumination for tiny features.
- Window Lighting: Position your setup near a large north- or east-facing window to maximize diffused sunlight. Avoid direct sunlight, which can cause discomfort and uneven lighting.
- Use Reflectors: To fill shadows and add dimension, place a white reflector or foam board opposite the light source. It’s an easy, affordable way to elevate your photos.
- Artificial Lighting Tips: When natural light isn’t available, opt for continuous softbox or LED lights with adjustable color temperature. Avoid harsh flashes that might startle the baby.
💡 Pro Tip: The Newborn Photography Guide by Clickin Moms recommends scheduling sessions during the baby’s longest nap periods to capture uninterrupted peaceful poses.
Step-By-Step Lighting Setup
- Scout your location beforehand for window angles and light quality.
- Set up your props and baby close to the window, avoiding direct sunlight.
- Use reflectors to bounce light onto shaded areas.
- If needed, supplement with continuous soft lighting—keep it warm and soft.
- Adjust camera settings to balance exposure and maintain natural skin tones.
| Lighting Source | Best Time | Effect |
|---|---|---|
| Natural Window Light | 8 AM – 11 AM | Soft, diffused, flattering on skin |
| Softbox Lighting | Whenever needed indoors | Controlled, warm, and shadow-free |
| Reflectors | Alongside natural light sessions | Fill shadows, add depth |
And honestly? Mastering lighting and timing combines technical skill with patience. But there’s one detail most owners completely overlook until it’s too late…
Post-Session Care And Editing Checklist
What happens after you’ve wrapped your newborn photo shoot is just as important as the session itself. The post-session phase involves careful handling of the images to preserve those tender moments and deliver a polished, professional result.
Picture this scenario: you arrive home with a memory card full of precious, raw photos. Without an organized workflow, you risk spending hours sorting, editing, and sometimes losing track of files. A structured post-session approach saves you time and guarantees consistency.
Start by backing up your files immediately; use multiple storage solutions to protect against accidental loss. Next, review your images systematically and select the best shots that capture your newborn’s personality, expression, and the session’s mood.
- File Backup: Use an external hard drive and cloud storage for at least two copies of all files.
- Image Selection: Cull duplicates, blurry shots, or those where the baby appears unsettled.
- Editing Workflow: Adjust white balance, exposure, and skin tones carefully to maintain natural softness. Remove minor blemishes while preserving baby’s unique features.
- Consistency: Apply presets or maintain uniform editing styles across images to create a harmonious collection.
- Final Formats: Deliver high-resolution files for print and optimized versions for online sharing.
💡 Pro Tip: The Professional Photographers of America recommend a secure, multi-phase backup strategy combined with non-destructive editing techniques for enhanced workflow efficiency and image safety.
Post-Session Editing and Delivery Checklist
- Immediately back up all files on at least two separate devices.
- Review and select the most expressive, well-composed images.
- Perform color correction focusing on soft, natural skin tones.
- Apply noise reduction and minor retouching while avoiding over-editing.
- Export images in multiple formats tailored for clients’ needs.
| Step | Action | Purpose |
|---|---|---|
| 1 | Backup All Raw Images | Protect against data loss |
| 2 | Select Best Photos | Highlight top moments |
| 3 | Edit for Color & Exposure | Ensure natural, pleasing look |
| 4 | Retouch Blemishes Sparingly | Preserve authenticity |
| 5 | Export in Various Formats | Match client and print needs |
But there’s one detail most owners completely overlook until it’s too late: staying consistent with your editing style builds your unique brand identity and client trust. What actually works might surprise you…
You’re Ready To Capture Magic
If you take just one thing from this guide, let it be: preparation is the key to capturing those precious newborn moments perfectly. From assembling the right gear, to creating a safe and cozy environment, and mastering the timing and lighting — every detail counts in your newborn photography checklist.
Before, you might have felt overwhelmed or unsure about where to start. Now, you have a clear path and practical steps to create stunning, heartfelt photos without stress. Confidence grows when you know what to expect and how to handle each stage with care. You’re equipped to turn fleeting newborn moments into lasting memories.
Which tip are you most excited to try in your next photo session? Share your thoughts in the comments—we’d love to hear about your journey capturing those tiny miracles!

About the Author: Lauren Marie Mitchell is a devoted mom of two and passionate pregnancy and newborn care writer who has spent years helping first-time parents navigate the beautiful chaos of expecting and raising a baby. Lauren created this blog after experiencing firsthand how overwhelming it can be to find clear, reliable guidance during pregnancy and the early newborn weeks — and how much difference a simple checklist or honest guide can make.
Lauren is not a medical professional — just a real mom who has been through the sleepless nights, the hospital bag panic, and the endless Google searches at 3 a.m. Every article on this site is researched using trusted sources including the American College of Obstetricians and Gynecologists (ACOG), the American Academy of Pediatrics (AAP), and the World Health Organization (WHO), so you always get information you can count on.